Category Archives: Accessories

Trail Skinz

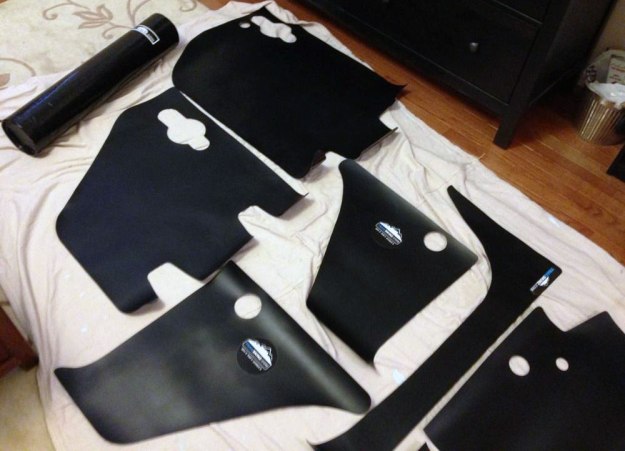
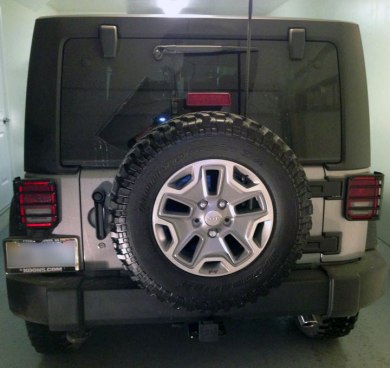
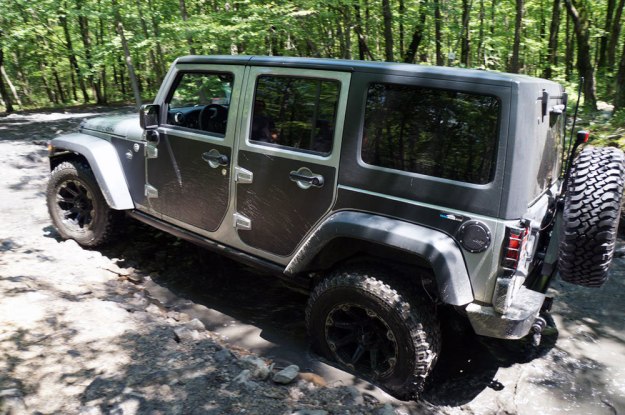
A few months ago, I went out on a wheelin’ trip into some muddy & wooded parts of the east coast on an all breeds trip. Some folks brought out their FJ Cruisers, I saw a handful of Land Rovers, a couple full size trucks, but by far it was mostly Wranglers. One of the wranglers that stood out to me had these silly looking panels all over it called TrailSkinz. I of course immediately started laughing…Who would need such a thing? That looks just silly! That’s not a real Jeep product! I kept on walking and checking out rigs, but that almost stock Jeep kept popping up in my mind. We armor everything below from rocks, so why not armor the paint too? As the day wore on and the brush got thicker and meaner, I started thinking more and more about that lady in her JKU with her silly panels. Each nasty sounding scrape down the side got me thinking that perhaps maybe aren’t so silly after all.

I staked out the website for a month or so waiting for a good deal and ordered a set just before my next wheelin’ trip to RC. They arrived in a tube and I didn’t take them out until it was time to put them on the morning before setting out on trail. Doing a little walk around, found that I actually kind of like that flat black look on the billet silver. It doesn’t hurt that it makes you a little more fearless on the thicker trails too!

TrailSkinz1

There wasn’t a ton of brush on the trails I went on, but what there was the TrailSkinz handled with no problem. When you are done with trail, just pull them off, take some mild soap and a soft sponge to them. Lay out to dry for a few minutes, then roll them back up in the tube they came in until the next trip. I went out looking for a fancy art tube with a screw top to store them in, then thought about just making something out of PVC… but in the end, the wife helped me duct tape the hell out of the shipping tube and it seems to be working great!

TrailSkinz2

I’ve got a flying machine!

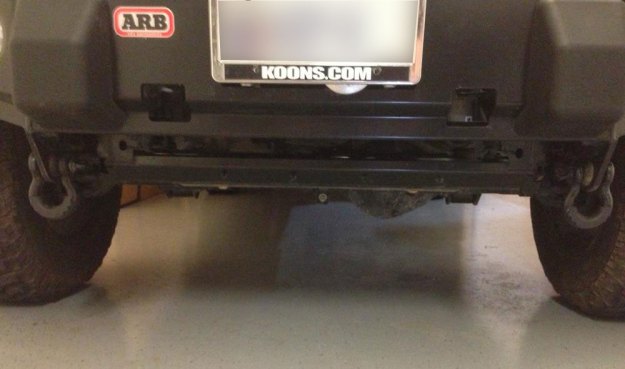
One of the first steps to my build was a front bumper swap. When I pulled off the stock bumper, there was this weird little plastic piece mounted to the underside of the bumper. I stared at it and wondered WTF? Is this what passes for a skid plate in 2013? The short answer is no, that’s a plastic front air dam that the engineers tucked under there to help the aerodynamics squeeze out another 1-2 mpg’s. When I swapped it for the newer bumper, the result was a small gap that acts like a sail at highway speeds and a resulting fuel economy drop.

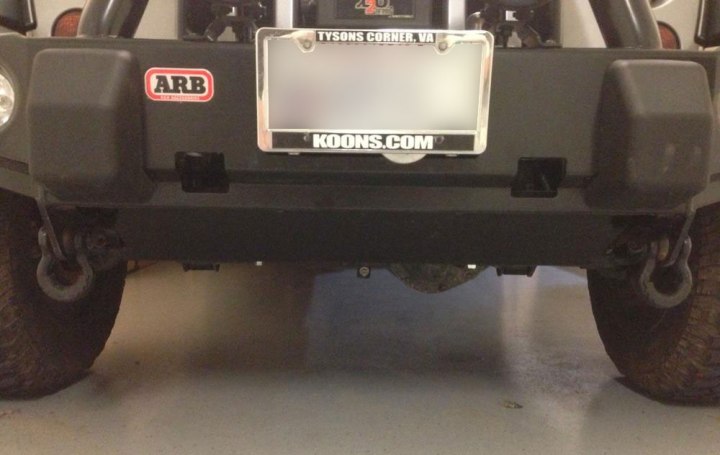
Air-Dam-Before

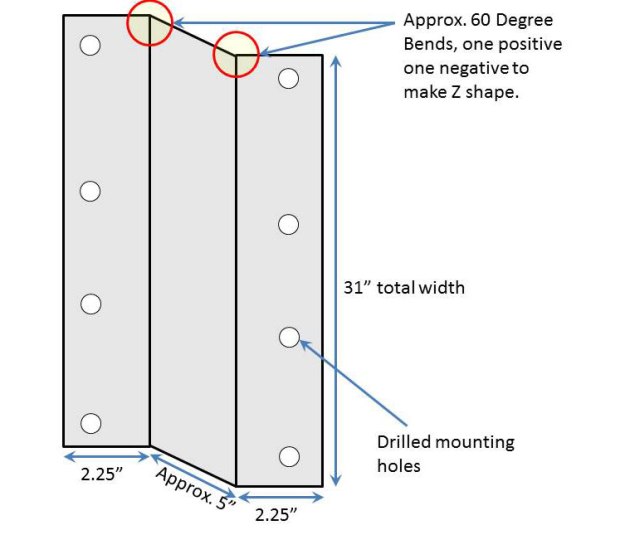
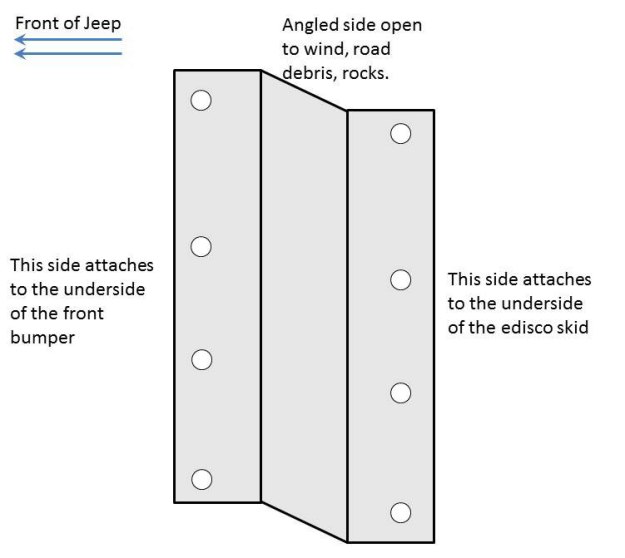
Since I swapped it out so early, I don’t have any mpg data to verify my hypothesis. So… to the internets! I found a post where a guy ran his JK for around 1,000 miles tracking his fuel economy w/ the OEM air dam in place and then 3 tanks of gas without it. His numbers show that he lost almost 2 mpg courtesy of that silly little plastic piece. So, my mind started churning and I started brain storming. What’s stopping me from connecting the bottom of my bumper to my skid plate somehow to cover that big gap? Maybe I can get 2 mpg’s back too? My idea started out on the back of a bar napkin and then grew to a scrap piece of paper and finally to a poor 3d image w/ some notes using power point.

Air-Dam-Sketch-1

Air-Dam-Sketch-2

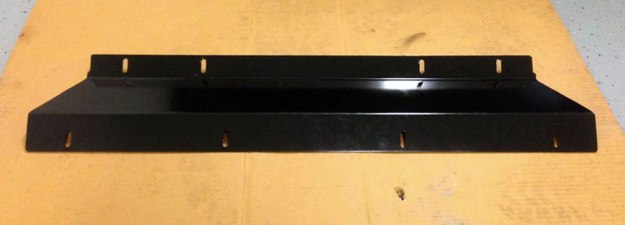
I reached out to a local fabricator (who came well recommended) with my idea, and we met to take some official measurements. After chatting a bit and crawling around under the front of the Jeep, we were seeing eye to eye and he went off to play in his shop. The result a few weeks later (he went on vacay!) looked pretty damn cool imho.

Air-Dam-Prototype

Personally, I’ve never [EVER] had the opportunity to take an idea in my head all the way from concept to a product I can hold in my hands. Installing it on my JKUR, I felt like an inventor. I was giddy! My eyes are opened to the concept that if I can dream it up and draw it, I can install it. Without further delay, here is the finished product with the ORFAB skid reinstalled back behind it.

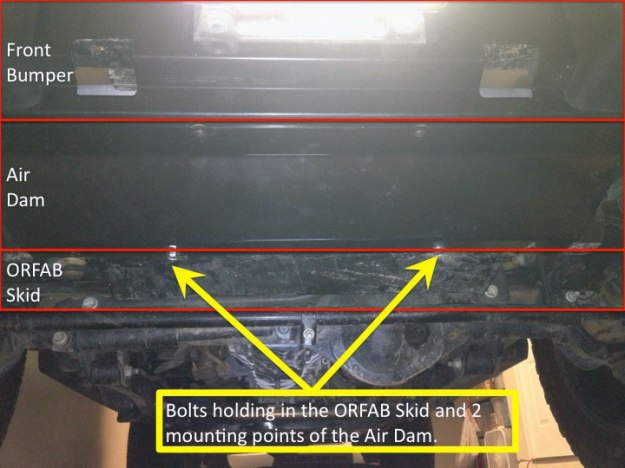
Air-Dam-InstalledAirDam-&-Skid

Sure, it doesn’t look like much and I bet you had to flip back to the before pic (look under the jack points in the bumper) just to see if it was really there, but I’m hoping that it’s good for 2 mpg’s. Perhaps that’s a little optimistic, but I’ve got 4,100 miles of data to test my hypothesis against and my Aeroforce Tech. gauge to show me instant mpg’s on the highway. It’s light weight 5000 series painted aluminum and with those bends, it’s strong enough to take a bit of a beating or stand up to plenty of road debris & wind. We’ll see this weekend how my new piece holds up at RC and on the highway there and back. Has someone made one of these before? Maybe, but I’ve never seen one in person nor could I find one that would fit my Jeep or found any others online. So, I’m claiming it as a brand new piece!

uConnect 430n Wallpaper (How To)

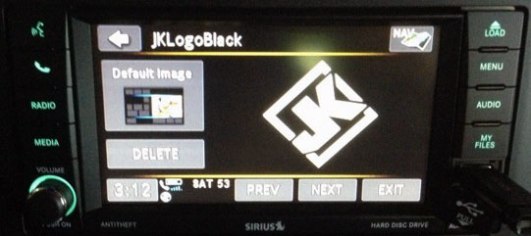
Here’s a quick run through for anyone who needs it on how to work with wallpaper on the uConnect 430n. This may also be the same on other uconnect systems as well, but I am only familiar with the 430n.

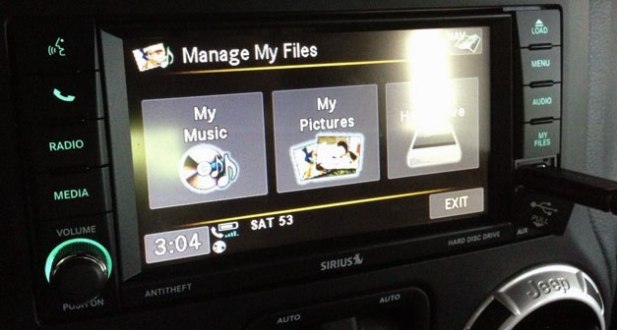
With the vehicle running and the nav system turned on, insert a flash drive with the images you’d like to use. The 430n will automatically search the drive for music files first and switch you to them. Personally, I like to listen to the radio while I fiddle with images, so I click the radio physical button to return to listening to the radio. This will not stop the head unit from searching your flash drive by the way. Next, push the “My Files” physical button on the front of the head unit to access your file storage.

ImagePush the “My Pictures” button on the touch screen to get to your picture library & then click the “add” button at the bottom of the touch screen.

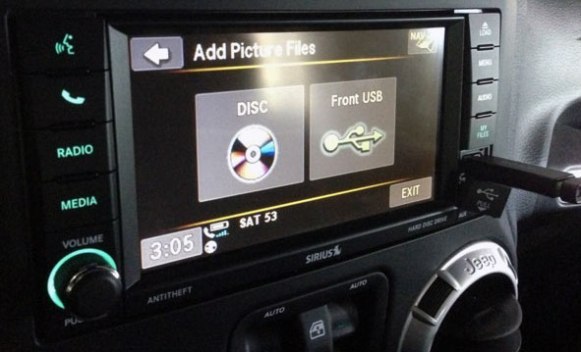
ImageSelect “Front USB” to navigate the image files on your flash drive. (I suggest using an empty flash drive with nothing but the images you want to load. This small step will really make the process quicker.)

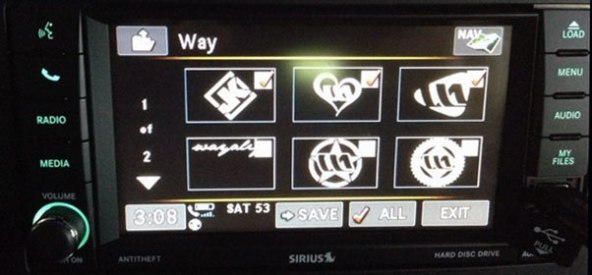
ImageSelect either one picture at a time by touching it or click the “All” button at the bottom to select all the pictures in the directory. When finished selecting, click “Save.”

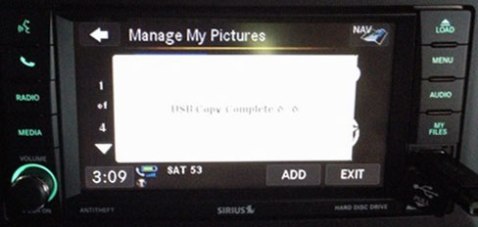
ImageWhen the file transfer is complete, you’ll see the following notification:

ImageTouch one of your new pictures to see it up on the screen. Touch the next/prev buttons at the bottom to scroll through the images saved on your Jeeps hard drive. When you have an image on the screen you like, click the “Set as Picture View” button on the left to set it as your new background image.

ImageReturn to your radio display by pushing the physical radio button on the head unit. If the image doesn’t automatically display, you may still have information displayed instead. Click the information button (looks like an i with a circle) on the bottom right of the touch screen to toggle to picture view mode.

ImageHope that works for you and don’t forget to take your flash drive inside with you!

Air Up! (ARB CKMA12)

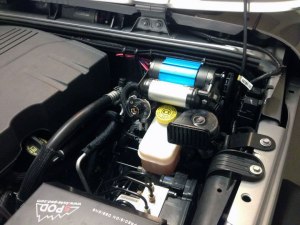
Something I’ve always wanted in a Jeep but have always been a little leery of getting was on-board air. Simply b/c of the amount of space a full compressor takes up and the added weight. Lucky for me (not so much for my wallet!) I found an ARB High Output compressor kit from NorthRidge4x4. This little compressor fits under my hood in some dead space and has no problem airing up tires (only 32’s for now) and possibly filling up a small tank for some air tools. But really, I only plan to use it for tires after trails since I don’t even own any air tools at the moment.

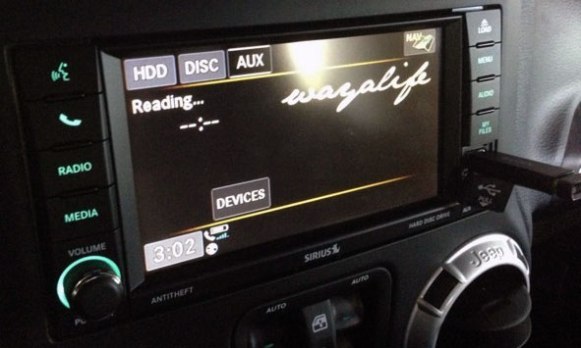
I was just about to do a full write of my on-board air compressor install on this build thread, but I got lazy and also found a really good write-up on wayalife.com. My bracket is a little different as it sits back against the firewall while his is perpendicular to mine. I had to relocate the horn and I wired the compressor to my sPod instead of the supplied switch, but everything else is pretty much the same. Here it is installed in all its on-board air goodness!

ARB-Compressor

The only complaint I have isn’t about the product, which works very well, it’s in my install. I drilled a new hole in the bracket when I had to move my horn and now I believe it’s not grounding out properly. Nothing a metal file and some patience won’t fix tho!

Parts before the JK is even here?

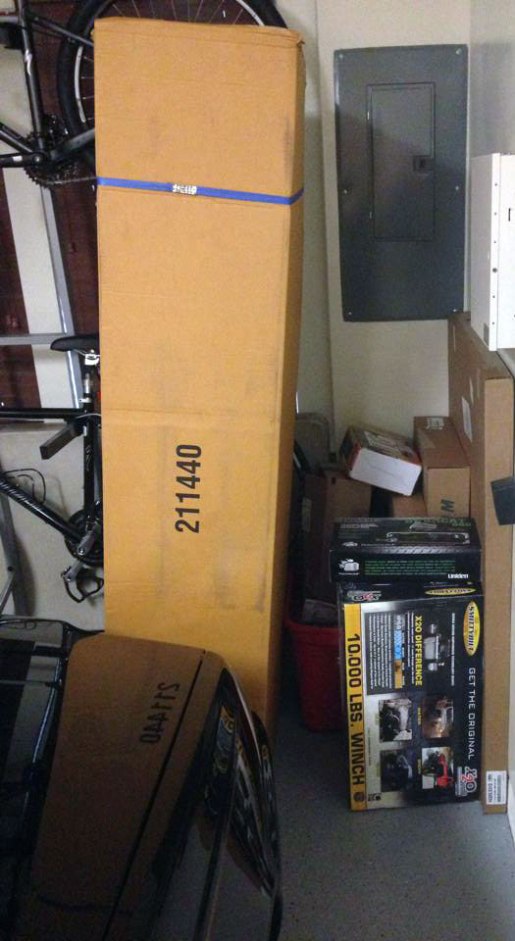
After almost 2 months and no Jeep I began to grow a little restless. Rather than just twiddle my thumbs, I decided to put some of that creative energy towards planning out my build. I’ll cross off some of the [really] easy dressing things off the list first – locking gas cap, wheel locks, etc. Next, that plastic bumper & front “skid plate” (chin spoiler? Wind diffuser? Whatever it is.) has got to go. Before I knew it, a pile of parts was sitting in my garage waiting for the Jeep to arrive!

Parts!

Parts Waiting:

  • ARB Deluxe Bull Bar
  • Uniden Bearcat 880 CB w/ Firestik HD Coax Cable
  • Fire Stick 2’ tuneable CB antenna, w/ HD Antenna Spring & Firestik coax
  • IPF 968 flood lights w/ stone guards
  • Mopar chrome exhaust tip
  • Mopar door sill guards
  • Mopar fuel filler door
  • Mopar Hitch Reciever Plug
  • Mopar Locking fuel cap
  • Mopar Wheel Locks
  • Pilot Strobe Kit Clear
  • Quadratec Rubber Floor mats front/rear/trunk
  • Rugged Ridge tail lamp guards
  • Smittybilt D-rings
  • Smittybilt XRC X20 10 Winch
  • TeraFlex CB Antenna Mount

First things first, the easy stuff

It’s Monday night and the JK just got home, the garage is heated, clearly it’s time to start tossing on some goodies from that pile. It’s better to have a pile of goodies on the Jeep than it is to have them sitting in the garage taking up space, right? So on they go! First up, the rear hitch plug (I think I’ve lost about 4 of these off my TJ courtesy of some mud pits) that slips on easily, and a chrome exhaust tip that bolts on with a few turns of the socket. Even a Jeep can have a little teeny tiny bit of bling, right?

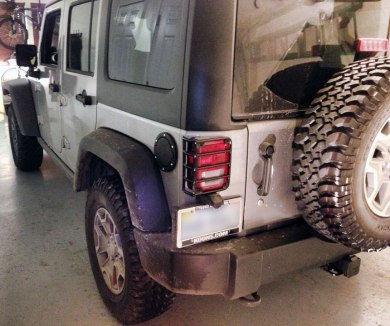
Since I was planning on popping off the rear tail lights to attach a set of Rugged Ridge tail lamp guards, this became the ideal time to also install the new Mopar fuel filler door (it helps to reach through where the tail lights attach to pop off the OEM filler bezel). Personally, I think the filler door is an incredibly cool looking piece of kit and is also great to keep mud off of your locking gas cap (key coded by some kind folks at the dealership parts department). The door sill guards go on with minimal effort (it’s just 3M tape) as long as you clean and prep the area properly followed by Mopar’s rotating wheel locks to keep my wheels/tires out of borrowing hands.

The bigger plan for tonight was to install all of my CB components. I removed the spare tire, pulled 2 bolts from the spare tire mount while loosening the rest to get a little play in the mount to slide that the Teraflex CB Antenna Mount into place. Finishing up is as easy as tightening up all 8 tire mount bolts. Next comes the Firestik on a HD spring (do yourself a favor and invest in a spring. I think I broke 3 sets of antenna mounts before I got myself one), and running the Firestik coax through the rear tailgate. There’s plenty of space to conceal everything on the tailgate and under the plastic on the inside. I’d post a picture, but there’s really nothing to see (that’s the idea!).

With the excitement of an 8 year old fat kid w/ a 6 pack of cupcakes, I unboxed my Uniden Bearcat 880 CB. I’ve been researching this thing for the better part of 2 weeks. New age LED and display tech meets old world simple CB technology, what could be better?? Well, one thing that I might have overlooked was where exactly I was going to shove a full size CB.
D’oh! Back in the box it goes for something that’ll fit a little better.

First ModsFirst Mods